

If your design needs to print to the edge, remember to provide artwork with bleed!
如果你嘅設計要印到紙嘅邊緣,記得提供出血檔案!
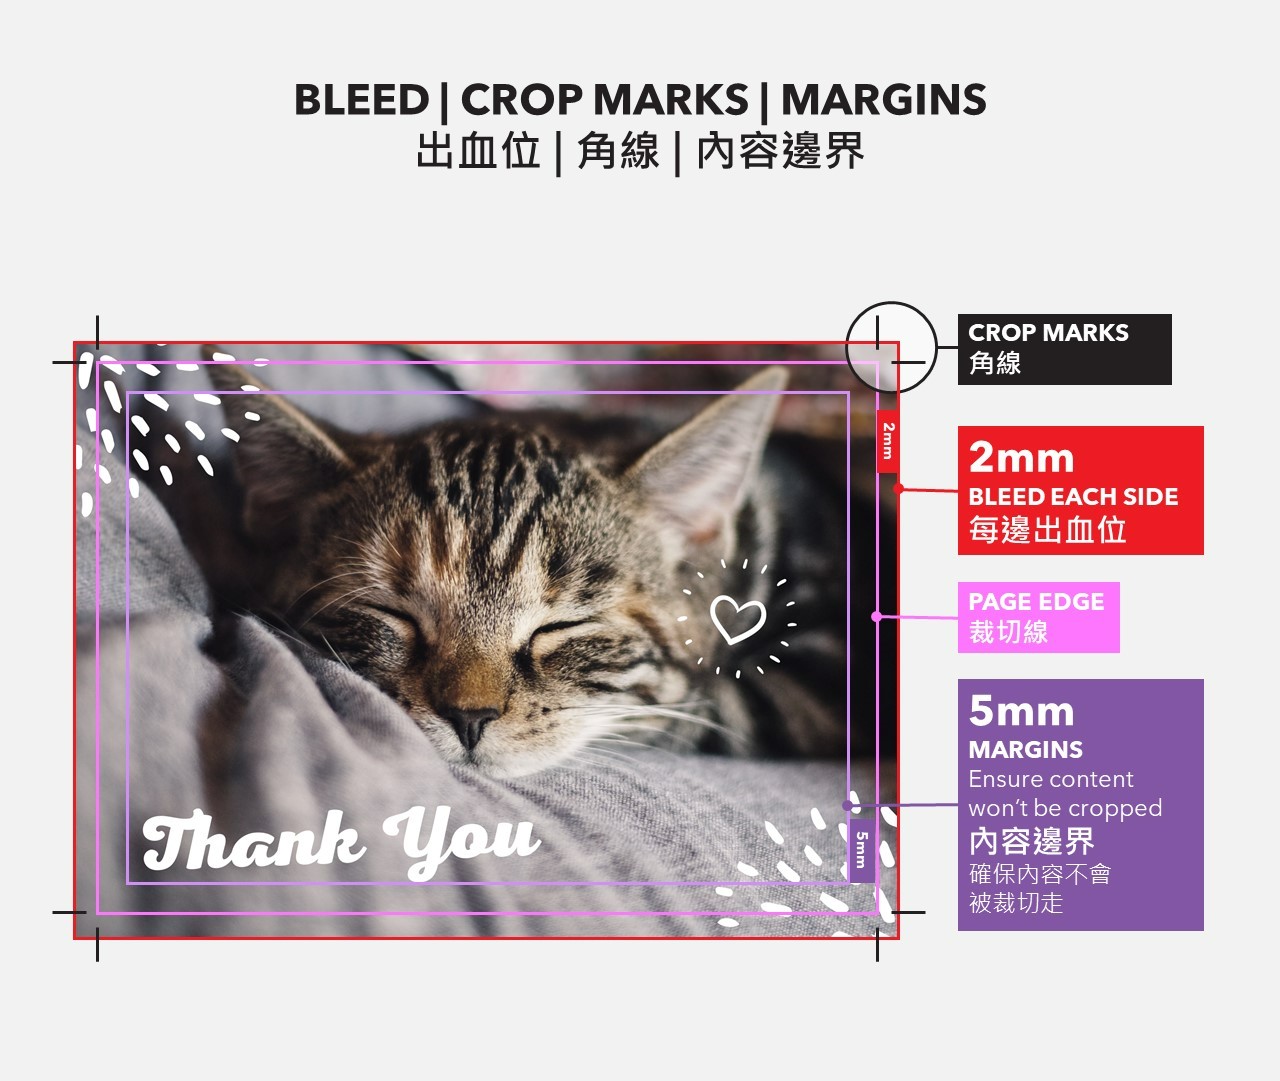
Bleed is an essential concept for printing. As printing machine is not able to print to the edge, the normal procedure is to print with bleed then crop to the exact dimension. If you do not like the white border appearing on your design, remember to add 2mm bleeding each side. At the same time, we recommend you to keep 5mm margins between content and paper edge to prevent cutting off your content.
喺印刷界,出血係一個非常重要嘅概念。由於印刷機係唔會印到紙邊,所以平時見到嘅出品都係先做出血,再切返正。唔想切嘅時候出現白邊,我哋就需要預留每邊2mm出血位。同樣地,我哋亦建議內容同邊緣距離最少5mm,避免裁切時切到內容。

If you are using word, powerpoint or other graphic software to create your design, and do not have the ability to add bleed, you can add 4mm for height and width to your design and treat it as bleed, which will be trimmed when finishing. E.g. Finish: 148x105mm, JPG: 152x109mm
Still found it difficult? The easiest way is to leave over 5mm between content and paper edge when designing. We will help you enlarge your artwork a bit when printing and crop it back afterwards. If your requirement is not as high, this is the simplest way for you.
如果你用Word、Powerpoint或者其他繪圖軟件製作你嘅設計,然後冇辦法加出血位,你可以喺長度同闊度各加4mm,作為出血位,印出後可以裁走。
例如完成尺寸:148x105mm,稿件尺寸152x109mm
都係有困難?最簡單就係設計時,內容同紙邊距離多過5mm,等我哋幫你印刷時放大少少稿件,最後再切返正。如果要求唔高嘅話,都可以用呢個方法處理。
General File Requirement:
– Original dimension with outline fonts PDF
– CMYK
– If design with bleed, please add 2mm each side with crop marks
– Please keep content 5mm away from margin to ensure content won’t be cropped
一般檔案要求:
– 原大 outline fonts PDF
– CMYK
– 如要出血,每邊請加2mm出血位及角線
– 內容最好同邊緣距離5mm,確保唔會切到內容